
Faucet
How to Replace a Bathtub Faucet: A Step-by-Step DIY Guide
Author: Kirill (Design Director)21 Feb 2025
|10 min read

Replacing a bathtub faucet is a straightforward home project that can refresh the look of your bathroom without the need for a full remodel. This guide will walk you through the process step by step, offering helpful tips along the way.
Before getting started, gather the following:
Adjustable pliers
Flathead screwdriver or hex key (for set screws)
Utility knife or razor blade
Plumber’s tape (for screw-on faucets)
Plumber’s grease (for slip-on faucets)
Rubbing alcohol & cleaning towel
Silicone caulk & caulk gun
Microfiber cloth (for cleaning the pipe)
New bathtub faucet
Step-by-Step Guide to Replacing a Bathtub Faucet
1. Identify Your Bathtub Faucet Type
Before purchasing a new faucet, determine whether you have a screw-on or slip-on faucet:
Slip-On Faucet: Has a small set screw underneath. If you see one, you have a slip-on type.
Screw-On Faucet: No visible screw—this type simply twists onto a threaded pipe.
Additionally, check how far the copper pipe extends from the wall—typically 1 inch or 4 inches—to ensure your new faucet will fit properly. If your faucet has a diverter (a small pull-up knob to redirect water to the showerhead), buy a replacement with the same function.
Tip: Keep your tools (Allen wrench or screwdriver) close by before you start, so you're not scrambling mid-project.
2. Turn Off the Water Supply
Locate your home’s water main shutoff valve and turn it off to prevent water from flowing while you work.
Test by turning on the bathtub faucet—if water still runs, double-check that the main shutoff valve is fully closed.
If water continues flowing even with the main shut off, you may have a faulty valve and should consult a plumber.
Safety Tip: Always relieve pressure in the water lines before removing any plumbing fixtures. This prevents unexpected water spray and potential damage to your bathroom.
Apply silicone caulk around the pipe opening to seal any gaps in the wall, preventing moisture buildup behind the fixture.
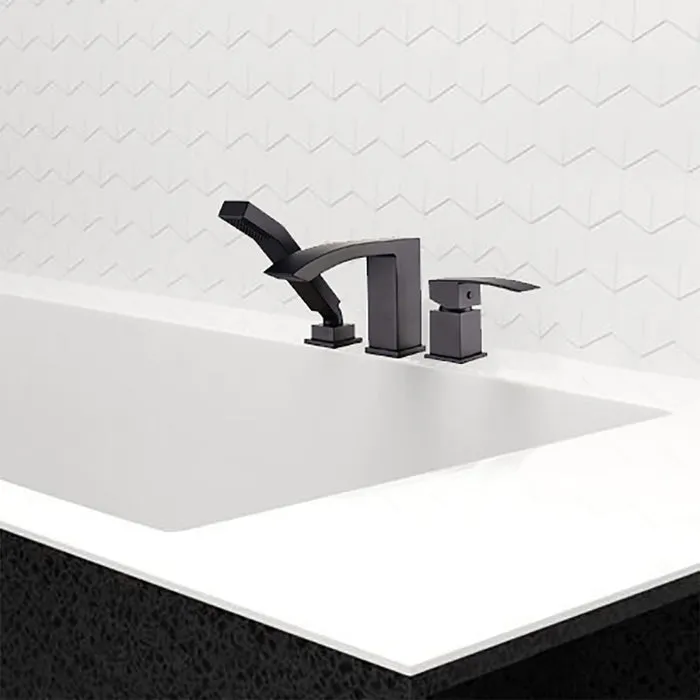
SATRO Three Holes Deckmount Bathtub Filler
3. Remove Old Caulking
Use a utility knife to carefully score around the existing bathtub faucet where it meets the wall. This will help loosen the seal and make removal easier.
4. Remove the Old Faucet
For a screw-on faucet: Turn the fixture counterclockwise until it detaches from the pipe.
For a slip-on faucet: Loosen the set screw with a screwdriver or hex key, then pull the faucet straight off the pipe.
If the faucet is stuck, gently wiggle it while pulling. Avoid using excessive force to prevent damage to the plumbing.
Tip: Put a towel in the bottom of the tub to prevent screws from falling into the drain.
Related: The Hidden Dangers of Old Faucets: Should You Upgrade Now?
5. Clean the Pipe Connection and Caulk the Wall Opening
Once the old faucet is removed:
For screw-on faucets: Remove old plumber’s tape from the threads and clean with rubbing alcohol.
For slip-on faucets: Wipe away any old plumber’s grease and debris with a rag.
6. Waterproof the Pipe Connection
For slip-on faucets: Apply a thin coat of plumber’s grease to the copper pipe.
For screw-on faucets: Wrap pipe thread tape around the threads (2–3 layers) to ensure a watertight seal.
7. Install the New Bathtub Faucet
For a screw-on faucet: Carefully twist the new fixture onto the pipe until snug, making sure the spout faces downward. Do not overtighten.
For a slip-on faucet: Slide the new faucet onto the pipe until it sits flush against the wall, then tighten the set screw securely.
Tip: Tighten set screws and connections snugly—but be cautious not to over-tighten, as this can strip threads or damage components.
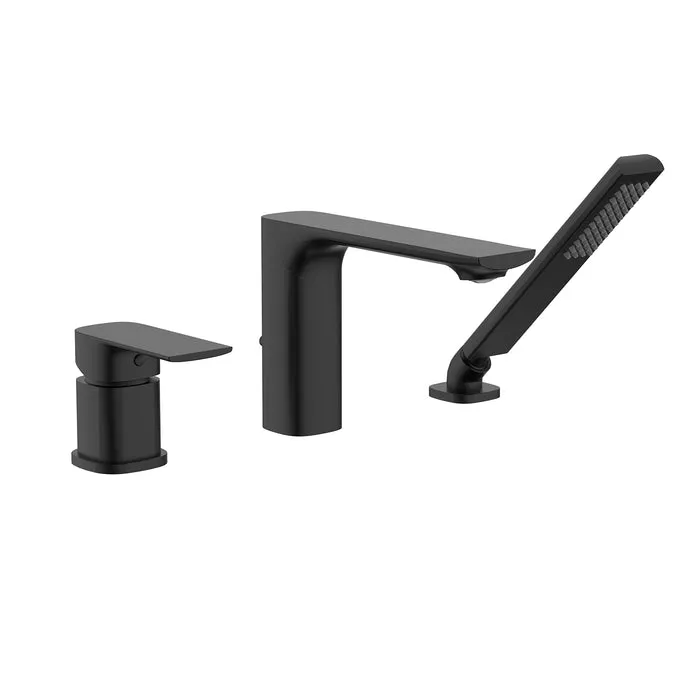
TIMELYSS Three Holes Deckmount Bathtub Filler
8. Apply Caulk Around the Faucet
Run a thin bead of silicone caulk along the top and sides where the faucet meets the wall, leaving a small gap at the bottom. This allows any trapped moisture to escape, preventing mold growth.
Smooth the caulk with your finger and wipe away excess with a damp rag.
9. Restore Water Supply and Check for Leaks
Turn your water main back on and test your new faucet:
Run both hot and cold water for one minute.
Engage and disengage the diverter (if applicable) to ensure proper water flow.
Check around the faucet for leaks—if water drips from behind the fixture, reapply plumber’s tape or consult a plumber.
If no leaks are present, congratulations! You’ve successfully replaced your bathtub faucet.
For modern bathroom faucets and other fixtures, check out our collections and find the perfect fit for your home.
Frequently Asked Questions (FAQs)
Can I replace a bathtub faucet without professional plumbing experience?
Absolutely! Replacing a bathtub faucet is a beginner-friendly DIY project. With the right tools, a little patience, and this step-by-step guide, most homeowners can complete the task in under an hour.
What if my new bathtub faucet doesn’t fit the existing pipe?
If the copper pipe extending from the wall is too short or long, you may need a pipe extender or adapter. Always measure the length of the exposed pipe before purchasing your replacement faucet to ensure a proper fit.
Do I need to turn off the water supply to replace a bathtub faucet?
Yes, turning off the water supply is essential. Even though most bathtub faucets don’t have a dedicated shutoff valve, you’ll need to locate your home’s main water shutoff to avoid leaks or water damage during the installation process.